Summary: in this tutorial, you’ll learn how to use the Tkinter Entry widget to create a textbox.
Introduction to Tkinter Entry widget #
The Entry widget allows you to create a simple textbox with a single text line. To create a textbox, you use the following steps:
First, import ttk module from tkinter:
from tkinter import ttkCode language: JavaScript (javascript)Second, create the Entry widget’s constructor:
entry = ttk.Entry(master, **kw)Code language: Python (python)In this syntax:
- The
masteris the parent frame or window, on which you want to place theEntrywidget. - The
kwis one or more keyword arguments you use to configure the widget.
Note that if you want to create a multiline textbox, you can use the Text widget.
To get the current value of an Entry widget as a string, you use the get() method:
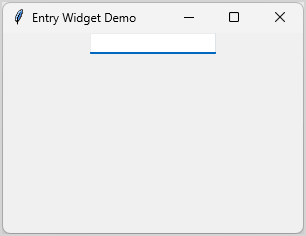
entry.get()Code language: Python (python)The following program shows how to create an Entry widget and display it on the main window:
import tkinter as tk
from tkinter import ttk

root = tk.Tk()
root.geometry('300x200')
root.title('Entry Widget Demo')


name_entry = ttk.Entry(root)
name_entry.pack()


root.mainloop()Code language: JavaScript (javascript)
Output:
Setting the focus #
To enhance user experience, you can move the focus to the first Entry widget after the window appears. Once the Entry widget has focus, it’s ready to accept the user input.
You use the focus() method of the Entry widget to set the focus to a particular entry:
import tkinter as tk
from tkinter import ttk

root = tk.Tk()
root.geometry('300x200')
root.title('Entry Widget Demo')


name_entry = ttk.Entry(root)
name_entry.pack(pady=5)
name_entry.focus()

email_entry = ttk.Entry(root)
email_entry.pack(pady=5)

root.mainloop()
Code language: Python (python)
Output:
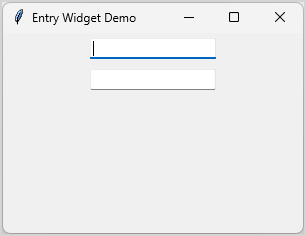
How the program works:
First, create two Entry widgets name_entry and email_entry.
Second, create a padding between the first and second Entry widgets, we set the pady to 5 in the pack() method:
name_entry.pack(pady=5)Third, set the focus on the name_widget by calling the focus() method:
name_entry.focus()Code language: CSS (css)Typically, you use a Label widget with an Entry widget to make the UI more clear:
import tkinter as tk
from tkinter import ttk

root = tk.Tk()
root.geometry('300x200')
root.title('Entry Widget Demo')


name_label = ttk.Label(root, text='Name:')
name_label.pack(pady=2)

name_entry = ttk.Entry(root)
name_entry.pack(pady=5)
name_entry.focus()


email_label = ttk.Label(root, text='Email:')
email_label.pack(pady=2)

email_entry = ttk.Entry(root)
email_entry.pack(pady=5)

root.mainloop()
Code language: JavaScript (javascript)
Output:
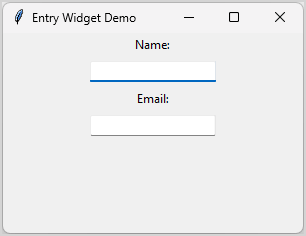
Note that you’ll learn how to make a nicer and more usable layout in the pack and grid tutorial.
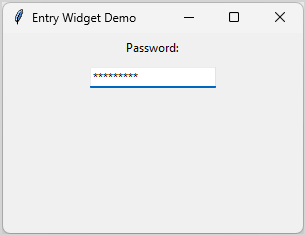
Entering sensitive information #
To hide sensitive information on the Entry widget, e.g., a password, you can use the show option.
The following creates a password entry so that when you enter a password, it doesn’t show the actual characters but the asterisks (*) specified in the show option:
password_entry = ttk.Entry(root, show='*')Code language: Python (python)The following program illustrates how to create a new Entry for entering a password:
import tkinter as tk
from tkinter import ttk

root = tk.Tk()
root.geometry('300x200')
root.title('Entry Widget Demo')


password_label = ttk.Label(root, text='Password:')
password_label.pack(pady=5)

password_entry = ttk.Entry(root, show="*")
password_entry.pack(pady=5)

root.mainloop()Code language: JavaScript (javascript)
Output:
Two-way binding with a StringVar object #
Typically, you associate the current value of an Entry widget with a StringVar object via the textvariable parameter:
text_var = tk.StringVar()
textbox = ttk.Entry(root, textvariable=text_var)Code language: Python (python)
In this syntax:
- First, create a new instance of the
StringVarclass. Thetext_varwill hold a string value. - Second, associate the
StringVarobject with anEntrywidget by assigning theStringVarobject to thetextvariable.
After linking a StringVar object with an Entry widget, you can track and change the current value of the Entry widget via the StringVar object.
On the other hand, if you change the value in the Entry widget, the change will be reflected in the value of the StringVar object.
This is called two-way binding between a StringVar object and the Entry widget.
To get the current value of the Entry widget, you can call the get() method of the StringVar object as follows:
text_var.get()Code language: PostgreSQL SQL dialect and PL/pgSQL (pgsql)If you want to execute a function automatically when the value of the Entry changes, you can use the trace_add() method of the StringVar object:
text_var.trace_add('write', callback)Code language: PostgreSQL SQL dialect and PL/pgSQL (pgsql)Besides the 'write' event, the StringVar supports the 'read' and 'unset' event.
Tracing text changes #
The following program shows how to track text changes in an Entry widget using a StringVar object:
import tkinter as tk
from tkinter import ttk


root = tk.Tk()
root.title('Tracing Text')
root.geometry("250x100")


name_var = tk.StringVar()
name_entry = ttk.Entry(root, textvariable=name_var)
name_entry.pack()
name_entry.focus()


output_label = ttk.Label(root)
output_label.pack()

name_var.trace_add(
    "write",
    lambda *args: output_label.config(text=name_var.get().upper())
)

root.mainloop()Code language: PostgreSQL SQL dialect and PL/pgSQL (pgsql)
Output:
First, create StringVar object:
name_var = tk.StringVar()Code language: PostgreSQL SQL dialect and PL/pgSQL (pgsql)Second, link the StringVar object with the Entry widget:
name_entry = ttk.Entry(root, textvariable=name_var)Code language: PostgreSQL SQL dialect and PL/pgSQL (pgsql)Third, execute a lambda expression when the text of the Entry widget changes. The lambda expression converts the text of the Entry widget to uppercase and sets it to the output label:
name_var.trace_add(
    "write",
    lambda *args: output_label.config(text=name_var.get().upper())
)Code language: PostgreSQL SQL dialect and PL/pgSQL (pgsql)
Summary #
- Use the
ttk.Entrywidget to create a textbox. - Use the
showoption to create a password entry. - Track and change the current value of an Entry widget via a
StringVarobject.