Summary: in this tutorial, you’ll learn about the Tkinter Button widget and how to use it to create various kinds of buttons.
Introduction to the Tkinter Button widget #
A button triggers an action when you click on it. The tkinter button can display:
- Text label
- Image
- Both text label and image
Typically, an action is a function you want to execute when users click the button. To execute the function, you assign its name to the command parameter of the Button widget. This is called the command binding in Tkinter.
Here are the steps for creating a button widget:
First, import ttk from tkinter:
from tkinter import ttkCode language: JavaScript (javascript)Second, create a new button widget using the the Button constructor:
button = Button(master, **kw)Code language: Python (python)In this syntax:
- The
masteris the parent widget on which you place the button. - The
**kwis one or more keyword arguments you use to change the appearance and behaviors of the button.
Here are the common configurations of the button widget:
button = ttk.Button(
   master,
   text=label,
   command=fn
)Code language: Python (python)
In this syntax:
- The
textdetermines the label of the button. - The
commandspecifies a callback function that will execute automatically when you click the button.
Command callback #
The command option associates the button’s action with a function or a method of a class. When you click the button, the callback automatically executes.
To assign a callback to the command option, you can use a regular function:
def callback():
    # do something


ttk.Button(
   root,
   text="Click Me",
   command=callback
)Code language: Python (python)
If the function contains one expression, you can use a lambda expression:
ttk.Button(
   root,
   text="Demo Button",
   command=lambda: ...
)Code language: Python (python)
Button states #
The default state of a button is normal. In the normal state, the button will respond to the following events:
- Mouse click
- Keyboard press
The button can also have the disabled state. In the disabled state, a button is greyed out and doesn’t respond to the mouse click and keyboard press events.
To set the state of a button, you use the state() method:
# set the disabled flag
button.state(['disabled'])

# remove the disabled flag
button.state(['!disabled'])Code language: Python (python)
Tkinter button examples #
Let’s take some examples of using button widgets.
Simple Tkinter button example #
The following program shows how to display a Exit button. When you click it, the program is terminated.
import tkinter as tk
from tkinter import ttk

# main window
root = tk.Tk()
root.geometry('300x200')
root.resizable(False, False)
root.title('Button Demo')

# exit button
exit_button = ttk.Button(
    root,
    text='Exit',
    command=lambda: root.quit()
)

exit_button.pack(
    ipadx=5,
    ipady=5,
    expand=True
)

root.mainloop()Code language: Python (python)
Output:
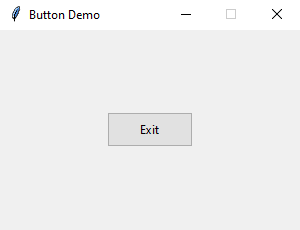
How it works.
The following creates the Exit button:
exit_button = ttk.Button(
    root,
    text='Exit',
    command=lambda: root.quit()
)Code language: Python (python)
The button’s command is assigned to a lambda expression that closes the main window.
Tkinter image button example #
The following program shows how to display an image button. To practice this example, you need to download the following image first:

Just right-click and save it into a folder that is accessible from the following program, e.g., assets folder:
import tkinter as tk
from tkinter import ttk
from tkinter.messagebox import showinfo


# main window
root = tk.Tk()
root.geometry('300x200')
root.resizable(False, False)
root.title('Image Button Demo')


def handle_click():
    showinfo(
        title='Information',
        message='Download button clicked!'
    )


download_icon = tk.PhotoImage(file='./assets/download.png')
download_button = ttk.Button(
    root,
    image=download_icon,
    command=handle_click
)

download_button.pack(
    ipadx=5,
    ipady=5,
    expand=True
)


root.mainloop()Code language: Python (python)
Output:
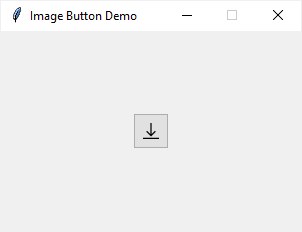
How it works.
- First, create a new instance of the
tk.PhotoImageclass that references the image file'./assets/download.png'. - Second, create the
ttk.Buttonwhose image option is assigned to the image. - Third, assign a function to the
commandoption. When you click the button, it calls thehandle_clickfunction to display a message box.
To display a message box, you follow these steps:
First, import the showinfo function from the tkinter.messagebox module:
from tkinter.messagebox import showinfoCode language: JavaScript (javascript)Second, call the showinfo function to display a message box:
showinfo(
title='Information',
message='Download button clicked!'
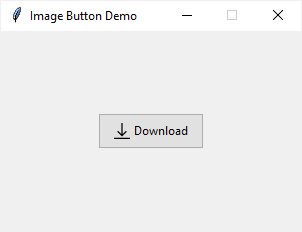
)Code language: JavaScript (javascript)Displaying an image button #
To display both text and image on a button, you need to use the compound option of the button. If you don’t, the button will display the text label only, not the image.
The following shows how to display both text and image on a button:
import tkinter as tk
from tkinter import ttk
from tkinter.messagebox import showinfo


# main window
root = tk.Tk()
root.geometry('300x200')
root.resizable(False, False)
root.title('Image Button Demo')


# download button handler
def handle_click():
    showinfo(
        title='Information',
        message='Download button clicked!'
    )


download_icon = tk.PhotoImage(file='./assets/download.png')

download_button = ttk.Button(
    root,
    image=download_icon,
    text='Download',
    compound=tk.LEFT,
    command=handle_click
)

download_button.pack(
    ipadx=5,
    ipady=5,
    expand=True
)


root.mainloop()
Code language: Python (python)
Output:
Summary #
- Use the
ttk.Button()class to create a button. - Assign a lambda expression or a function to the
commandoption to respond to the button click event. - Assign the
tk.PhotoImage()to theimageproperty to display an image on the button. - Use the
compoundoption if you want to display both text and image on a button.